Wedding bells!!!

Tags

, , , , , ,

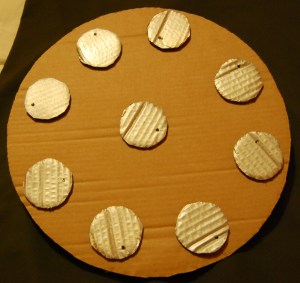
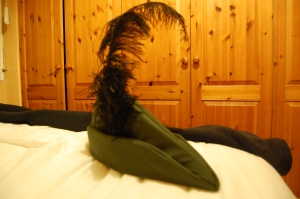
The day finally came when I was not only going to be married but when I could also display the special things I had gathered together for the event. Sadly, the wedding cake was not homemade, as I had previously planned (lack of culinary finesse, logistics and time constraints put paid to that) but I was able to display my very own homemade cake toppers. I had laboured intensively over these little papier maché doves in the months before the big day and they looked great on the cake! Lots of people commented and I’m sure they featured in many photographs.

My cake toppers on display

My cake toppers on display

Another AMAZING homemade touch was provided by my dad. I wanted some kind of post box because whenever I’ve been to a wedding myself I’ve felt a bit awkward carrying around my card for the happy couple if there’s no obvious place to put it. Well, Dad came up trumps. He built us a wooden pillar box, which he painted white and completed with a collection time notice. It proved a hit with the guests and is a precious souvenir of the day.

The wedding post box, next a glass, some cards and a some pens with which people could leave us a message

The wedding post box, next a glass bowl, some cards and a jar of pens for people to use to leave us a message (this was instead of a guest book)

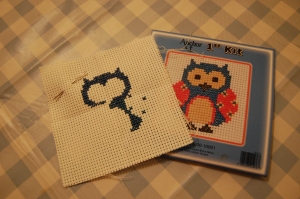
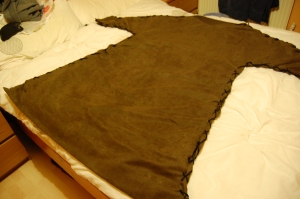
Keeping the handmade creativity in the family, my cousin surprised me with a lovely horseshoe she sewed together from small pieces of colourful fabric. Another eyecatching detail that prompted a lot of comments.

The fabric horseshoe made for me by my cousin

The fabric horseshoe made for me by my cousin

Many wedding details weren’t exactly homemade (indeed, a graphic designer friend did a very professional job of designing our invitations and orders of service) but I loved using my creativity to come up with a look for the wedding. To keep costs down I didn’t have big floral centrepieces on the tables. Instead, on each table I set a tealight lantern in the shape of a house on small mirror and made a ‘cloud’ for each one out of laminated card, which I attached with wire.* Each cloud had a number in it to signify the table number. Some blue petals were scattered on the mirror and to add a bit more colour a small vase of daffodils was placed beside each house. It was simple and budget friendly but very effective at delivering the spring look I wanted.

A tealight house and vase of daffodils set out on one of the tables

A tealight house and vase of daffodils set out on one of the tables

For the evening entertainment, we did a DIY disco. We hired lights and a PA system, through which we played several hours of songs we had saved onto a laptop. It worked brilliantly; only the songs we wanted to hear were played and because of this everyone loved the variety, and we set the music to a level that made great dancing (and dad-dancing!) but people could still have a conversation on the other side of the room. Another huge advantage was that it saved us a packet on paying for a cheesy DJ who’d do his own thing!

I am a bit sad that, now the wedding is over, I’m no longer putting my energy into making things for such a significant event, but it does mean I have more time. I intend to get more acquainted with the sewing machine I bought on a whim and perhaps craft some more papier maché objects.

*The credit for this should really go to my parents. It was my idea but they had the task of putting it into practice!

Building a bed for the night

Tags

, , , , ,

Yesterday, I spent the day in a wood learning basic survival skills with my amazing friends as part of my unique hen celebration. As my closest friends are not solely made up of girls, there would have been no point banning members of the opposite sex from attending and my team mates not only included girls and boys, but also my future husband and my dad. It was awesome and the things I made were the most useful I have achieved so far: shelter and fire.

Channelling our inner Ray Mears, we used the things around us – logs, branches and leaves – to construct a shelter that would have kept us dry for a night and certainly kept the wind off us during the day.

Building a shelter using the woodland's resources

Building a shelter using the woodland’s resources

The finished shelter

The finished shelter

The shelter completed, it was time to go for a forage. Not only did we learn about what we could (and definitely couldn’t) eat in the wild, but also other useful things such as making cord out of elm bark, finding water and using certain types of fungus for dressing wounds or burning for fuel.

The final part of the day was dedicated to learning how to start a fire. That was the really fun bit and a real achievement once you got it right. There were loads of ways of doing it. My favourite was using a piece of kit called a firesteel but by far the most rewarding was the primitive, and effective, bow drill method.

Despite the cold, it was a brilliant day and my only regret is not taking more photos. I’m seriously tempted to go on a woodland crafts course next!

Wedding (cake) preparations

Tags

, , ,

Having decided that I want to make my own wedding cake (madness?), I thought it was about time I started practising. I decided to try the middle tier – chocolate – and I’m happy to report that it at least looks OK, despite a large quantities of cake mix ending up all over the kitchen walls! Yes, it has a crack in the top, but I can turn it upside down. I’ve read that if you freeze cakes and then defrost them they’re easier to work with, so once it has cooled it will sit in the freezer until the weekend, when I plan to work out the best way of frosting it and how to stop it from drying out!

One freshly-baked middle tierOne freshly-baked middle tier

Colourful stitches

Tags

, , , ,

Having finished my owl cross stitch, I decided to do a little long stitch project. It looks pretty but it’s not really a type of needlepoint I’m keen on; I find cross stitch far more satisfying. Slightly disappointed by my discovery that most cross stitch patterns are either for kids or just a bit too twee, I’ve decided to design my own by drawing a picture on to graph paper and using that as a pattern. That’s for another day though.

An owl in cross stitch and a heart in long stitch.

An owl in cross stitch and a heart in long stitch.

After much searching, I finally managed to find the correct size frames in which to display these two projects in BHS.

Framed and ready to be hung on the wall.

Framed and ready to be hung on the wall.

Picking up an old skill

Tags

, ,

On the last day of my Christmas break I found myself in Hobbycraft trying to find  bits and bobs for wedding decorations but didn’t find much. I did, however, come across a cross-stitch set. It’s longer than I care to remember since I’ve done cross-stitch and when I saw it I thought I’d treat myself using some vouchers my ex-work colleagues gave me when I left my previous job four months ago. I like owls, so I’ll frame it and put it on the wall when it’s finished.

Part way through the pattern.

How to become a Viking or Robin Hood

Tags

, , , , ,

This New Year’s Eve I was invited to a fancy dress party. The theme: historical figures. Obviously, this gave me the opportunity to get creative and I set about making two outfits – one for me and one for my boyfriend, Paul. For his outfit, I decided to reuse some cardboard armour I made for a Roman-themed party a couple of years ago. This has already proven its versatility as I subsequently turned it into a Wizard of Oz tin man costume by spraying it silver (it was previously gold) and pairing it with a funnel covered in foil to make a hat. But this time it had to be historical, so we came up with the Viking Erik the Red.

I decided a Viking would wear a tunic under his armour and happened upon a pair of brown suede-style curtains in a charity shop while searching for a Viking helmet that I thought would be ideal. A fiver later, I took them home and set about cutting them up. I took the biggest jumper of Paul’s I could find and drew around it onto one of the curtains to make the template, adding a border of about 3cm. I didn’t cut anything off the bottom, leaving it the length of the curtain (Paul’s quite tall). This shape then became the template for the other side.

I now needed to fasten the two sides together. I didn’t want to use my sewing machine because I wasn’t sure if it could take the thickness of the material and I decided that using cord would look better. It’s not the kind of material that frays so snipped holes all the way around the edges and laced the cord through in a criss-cross pattern. Happily, it remained fastened together all night!

The completed tunic. It was worn under the cardboard armour.

I then needed to make ‘Erik’ look like he had red hair. We decided wigs were too expensive, so instead we used some red fringing sourced from Birmingham Rag Market and fastened it inside using double-sided tape.

The final touch was the armour. Paul made a round shield out of cardboard and stuck the buttons that had been on the tin man’s ‘body’ to it to make it look like it had rivets. After respraying the armour/tin man’s body, Erik was brought to life!

A shield made of cardboard with silver circles for rivets.

I also had to come up with my outfit. I thought Robin Hood would be a good choice and not one that other people might think of. I searched charity shops for items of green clothing but nothing would do the job, so I decided there was nothing for it but to make it from scratch. At the Rag Market again, I purchased a couple of metres of forest green cotton (strangely, the stallholder didn’t seem to think it odd that I needed it to make a Robin Hood outfit) and back at home used one of Paul’s T-shirts to make a template, leaving a border as I had for the Viking tunic. I used a tunic that I would wear on a normal day to guide me around the length. I sewed it all together on the machine and cut a V-shape for the neck, which I laced up with cord. I didn’t bother hemming the edges because I thought a frayed look would be fine.

Robin Hood's tunic. I wore this with a brown leather belt and leggings.

Then for the best bit: the hat! Using the offcuts I cut out two pairs of triangles around 40cm long. I sewed each pair together along the long edges and left the short edges open to make a pocket, then I sewed the two pockets together along one of the long edges. Next, I took some packing foam about 1cm thick I’d saved thinking it might come in useful for a craft project (it did!) and cut out two triangles that would fit inside the two pockets. I sewed the two open edges of the pocket up and together and then turned it all inside out so you couldn’t see the seams. My hat didn’t quite look complete and I decided I needed some kind of brim around it, so I cut two rectangular pieces of foam slightly longer than the length of the hat and about 5cm wide. Using the same principle as before, I made two pockets into which I could fit the foam, sewed the ends together and turned it all inside out. I then attached it to the base of the hat using double-sided tape because I didn’t have any suitable glue and couldn’t be bothered to stitch it. Finally, I tucked an enormous feather into the brim for that Errol Flynn look. I thought it looked awesome!

Robin hood's hat, complete with flamboyant feather.

But I wasn’t completely finished. I had a toy bow and arrow but the quiver that came with it was rubbish, so I made another one out of the offcuts from the Viking tunic. It was just a simple quiver-shaped bag with a strap made from a couple of strips of the same material. I filled the quiver with my three arrows as well as four bags of chocolate coins that I intended to give to the poor, having stolen them from the rich!

Erik and Robin in costume.

Love birds: Part three

Tags

, , , , , ,

It took some working out but I’ve managed to dress the bride! I had all sorts of ideas, including using doilies, glueing tissue to the bird so that it resembled flowers and making a bodice out of beads and sequins but none of those really worked out, so I decided to make a dress. I bought some white satin-like fabric and cut out five triangles. I had some ivory-coloured net circles that I picked up in Poundland a while ago thinking they could come in useful for the project and cut triangles the same size. I used them to cover each of the satin triangles and then sewed them all together to make a dress. I took a bit of the remaining net to make the veil and used wire and some beads I had lying around in my craft box to make the headband, which I sewed onto the veil. I then used superglue to stick it to her head.

I’ve also made a bit of progress on the groom. I tidied him up by wrapping black wool around wire and wrapping that around the edges of his suit, collar top hat and wings. He does look better but I’m not sure I’m entirely happy with the result as I think he still looks a bit messy. For now, though, here he is with his bride. Neither of them is finished yet because I want to give them legs so they can stand up properly. At least they can both see now though – I did the eyes with black permanent marker pen.

I should say, by the way, that the inspiration for the basic bird shape came from here: www.channel4.com/4homes/how-to/crafts/how-to-make-paper-birds.

******Update: I decided not to add any legs to the birds as I felt it would be too difficult to get them to stand up. I also decided I could live with the untidy edges of the groom, especially since everyone who has seen the cake toppers seems to like them!******

A family heirloom

Tags

, ,

I acquired a small loom after remembering that it had been in my parents’ loft for about 25 years. Originally belonging to my great aunt, she gave it to my mum in the late ’80s but unfortunately it remained packaged up in a box since. It dates back to the 1950s and, along with some scarves my aunt had made using the loom, there were some pages of the Radio Times in the box showing the listings for the day, including a picture of a very fresh-faced Cliff Richard.

The ‘Weavemaster Loom’ which belonged to my great aunt in the 1950s.

The ‘Weavemaster Loom’ is pretty easy to set up and suprisingly therapeutic when you get going, although I don’t think I’ll be mastering pattern reading any time soon. I have made a little mat, though, which I’ve been placing on the dining table under my painted pot. I’ve also got an idea for some woven Christmas presents.

The mat I made using the loom.

Dolls made just for me!

Tags

, , , , , ,

These two dolls weren’t created by me but my amazingly talented grandmother. A seamstress by trade, my nan made Humpty Dumpty and this doll for me when I was little, and she made another pair for my cousin who is a year older than me. Sadly, they’re stored in my parents’ house at the moment but I’d really like to have them on display in my house one day when I’ve made space.

Humpty is looking a little bit shabby these days as I must have enjoyed playing with him a lot when I was younger. He has a lilac cap, yellow woollen hair, features made of felt, and arms and legs made up of little discs of different colour fabrics strung together. Nan even put shoelaces on on his feet, as well as a bow decoration on the waistband around his belly.

I wasn’t a girly little girl and I didn’t like playing with dolls much, so unlike Humpty Dumpty, the little lady looks almost new and it wasn’t until I got older that I really appreciated the work that had gone in to making her. She wears a dress, a petticoat, a red gingham pinafore with matching hat, and a red velvet cloak with little red velvet shoes. Underneath her layers, Nan dressed her in bloomers in yet another fabric. Her eyes, nose and mouth are embroidered but the detail that really strikes me is her hair, which is made of brown wool and woven into braids at the back.


I’m so glad I took these two characters out of storage to have a look at them and I’ll cherish them as a way of remembering my nan.

A piece of cake

Tags

, ,

Not exactly a craft, but this cake is a variation of a recipe I found in The Guardian several years ago for so-called ‘healthy muffins.’ I’ve made a few changes to the ingredients and baked them into a cake, rather than muffins. The ingredients are:

250g wholemeal flour
60g porridge oats
1tsp baking powder
2tsp cinnamon
2 grated carrots
110g (ish) seeds and raisins mix
50g (ish) chopped almonds
1 grated apple
150g natural yogurt
1 chopped banana
1 tsp bicarbonate of soda
3 beaten eggs
100g melted butter
A few drops of vanilla extract

The method? Stick all the ingredients in a bowl, mix ’em all together, and bung the mixture in a tin, then whack it in the oven at 180C in a fan oven or 200C  in a standard oven. After 20 minutes or so you’ll have a yummy, wholesome cake. It’s not completely innocent because it’s not fat free and full of natural sugar but better than a Snickers and I’ve been taking a slice to work each day to avoid trips to the tuck shop!